

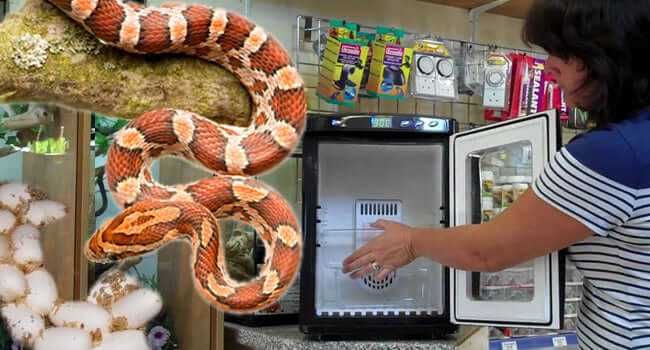
Corn snakes are one of the UK’s most popular pet snakes, and for good reason. Corn snakes have a great temperament, are very easy to care for, remain a manageable size and come in a variety of colours and patterns.
At Northampton Reptile Centre they are one of the snakes we most often recommend to new keepers.
Many people enter the hobby with this reptile and before too long, would like to advance their involvement by breeding their very own baby corn snakes. Here is our guide on how to properly collect and incubate your corn snakes’ eggs.
1. Prepare Your Egg Box

This step seems like it would be quite involved, but it’s actually very easy. You will need a plastic tub with no ventilation that will be airtight when the lid is on. Double check at this point that the tub will easily fit in your incubator.
Give the tub a good clean with your reptile friendly disinfectant and rinse thoroughly with warm water. Once it’s clean and dry, you can fill it with an incubation medium. This will usually be vermiculite or a pre-made product like Lucky Reptiles HatchRite.
If you use vermiculite you will need to prepare it before adding it to the tub. Simply follow the instructions provided on the packet. Make sure the medium isn’t wet, as you don’t want the eggs to come into direct contact with water.
Once your incubation medium is ready, fill the tub around 3/4 full and press little indents into the top of it with your thumb. Leave a gap between the indents and the wall and a small gap between each indent. This is where the eggs will rest and you need to provide plenty of space.
2. Collecting the Eggs

Collecting the eggs can be a very tense moment, you don’t want to put too much pressure on the egg and you want to keep it upright the entire time it’s being handled. The eggs are fairly hardy and if found soon after laying, are usually plump and easy to pick up.
Simply pick the egg up between your thumb and forefinger with light pressure, hold your open palm beneath just in case, and transfer it to your egg box. Each egg should have a small indent ready.
Simply place the egg making sure it never turns and press the medium around it to secure it in place. You definitely don’t need to bury the eggs. 1/5th below the surface is more than enough to make sure they don’t roll when you move the box. Make sure you leave plenty of space between eggs so they don’t touch. Cover the tub with the lid and place it into the incubator.
If you have multiple tubs in the incubator stacked one above the other, it’s a good idea to number them so you know which order they stack in and which way around. Any time you take the tub out, you’ll need to be careful to make sure it goes back in the same way. Eggs in warmer parts of the incubator will usually hatch first, and there may be a few days between the warmest spot and coolest spot.
3. Setting Up the Incubator

A good incubator should have both heating and cooling functions and be accurate to within 1 degree Celsius. Having both heating and cooling means the incubator can correct temperatures inside much quicker and deal with warm rooms much better than a unit with only heating.
Your incubator should be set to 84 degrees Fahrenheit and tested to make sure it works perfectly before you need it. The products are high quality and very reliable, but mistakes in transit can happen, and you want to make sure yours is definitely ready for when you need it.
As a secondary check, you could keep another thermometer inside the incubator just to double check temperatures.
4. The Incubation

It’s advised that you check your eggs as much as possible, perhaps a few times a week. You don’t want to take the lids off too often, as you’ll lose a lot of humidity. It’s best to keep them in the incubator as much as possible so they get consistent heat. We usually just check on them through the clear door on the front of the unit.
The main things to keep an eye out for are how plump the eggs seem and if any of them have perished or are going bad. The eggs are plump while the humidity is available, but when this starts to drop, you may see them sink a little and start to shrivel. To fix this, add a small amount of lukewarm water to one corner and check over the next few days to see if the condensation reappears and the eggs become plump again.
The eggs do breathe, but don’t need too much air. Once a fortnight or so we crack one corner to let the air recycle. The last thing to look for is discolouration on the egg. If an egg has perished or starts to go bad, it will usually turn quite dark and shrivel up.
It’s surprising which eggs make it so, rather than removing these, we would recommend isolating them in a separate tub or to it’s own corner of the same tub. Bring it to term and hope for the best, but don’t let it near the healthy eggs if it starts to look poorly.
What happens next?
Your eggs will take roughly 8 weeks (2 months) to hatch, but this can vary a little. When the snake hatches, it will cut through the egg, then sit inside until the fluid has been absorbed.
Once this is done, it will slowly come out and either burrow into the incubation medium or check out the rest of the tub. When the snake is fully out of the egg, you can remove it and place it in its enclosure.
Need Help or Advice?
If the snake is taking a long time to come out, just be patient. If you are worried, please give us a call on 01604 753823 so we can advise you. Remember that they may all hatch at different rates, so don’t worry if they aren’t all out and ready with the first that hatched they should all get there.
We are around all year, so if you have any questions regarding the process or care for the animals afterwards, please contact us. Good Luck!
